Mastering the Art of Freezer-Friendly Turkey Gravy: Your Secret Weapon for Stress-Free Meals
Imagine this: Thanksgiving dinner is almost ready, the turkey is resting, the mashed potatoes are steaming, but the gravy—the critical, unifying element—is nowhere in sight. The clock is ticking, hungry guests are gathering, and suddenly, making a perfect, lump-free gravy from last-minute drippings feels like an impossible task. Sound familiar?
What if we told you there's a better way? A way to enjoy rich, velvety, homemade turkey gravy without the last-minute scramble, not just for holidays but for everyday meals too? Welcome to the world of make ahead turkey gravy, a culinary revelation that promises to transform your cooking experience from hectic to harmonious. This comprehensive guide will walk you through creating a delicious, freezer-friendly turkey gravy that's ready whenever you are, ensuring perfect pouring every time.
Why Make-Ahead Turkey Gravy is a Game-Changer for Every Cook
The concept of make ahead turkey gravy is more than just a convenience; it's a strategic move that enhances both the cooking process and the dining experience. Here's why this approach will quickly become your favorite kitchen hack:
- Eliminate Holiday Stress: The biggest advantage, especially for major holidays like Thanksgiving and Christmas, is the unparalleled reduction in stress. Gravy often needs to be made right before serving, competing for stovetop space and your attention. By preparing it days, weeks, or even months in advance, you free yourself to focus on other dishes, enjoy your guests, and truly savor the moment. For more tips on holiday prep, check out our guide on Make-Ahead Turkey Gravy: Your Secret to Stress-Free Holidays.
- No Drippings? No Problem!: Traditional gravy recipes often rely heavily on pan drippings from a roasted turkey. While delicious, this means you can't make the gravy until the turkey is cooked. Our approach bypasses this entirely. This no-drippings turkey gravy recipe means you don't need a roasted bird to begin with, making it incredibly versatile.
- Consistent Perfection: Ever had a gravy turn out too thin, too thick, or lumpy due to rushed conditions? Making it ahead allows you to take your time, get the consistency just right, and perfect the seasoning, ensuring a consistently delicious result every single time.
- Freezer-Friendly Versatility: This gravy isn't just for special occasions. Its freezer-friendly nature means you can whip up a big batch and store it for whenever the craving strikes. Roast chicken for Sunday dinner? Turkey wraps for lunch? Mashed potatoes on a Tuesday? A quick thaw and reheat, and you have gourmet-quality gravy ready to elevate any meal.
- Simple, Wholesome Ingredients: Despite its impressive results, this gravy relies on a handful of basic, everyday ingredients you likely already have in your pantry. No fancy techniques or obscure components required.
Unveiling the Simplicity: Essential Ingredients for Perfect Gravy
One of the beauties of this easy turkey gravy is its reliance on simple, accessible ingredients. You don't need a gourmet pantry to create a truly spectacular accompaniment for your meals. Here's a closer look at the key players and how to get the most out of them:
- Butter: The foundation of flavor and the fat component for your roux. You can use either salted or unsalted butter. If using salted, be mindful when adding additional salt later. Unsalted butter offers more control over the final seasoning. Choose a good quality butter for the best flavor payoff.
- All-Purpose Flour: This forms the thickening agent, creating the essential roux. While all-purpose flour is standard, you can experiment with gluten-free alternatives if needed, though the consistency might vary slightly. The key is to cook the flour sufficiently to remove any raw taste.
- Salt and Pepper: Your fundamental seasonings. These are added during the cooking process and can be adjusted to taste. Don't be shy about seasoning, but always taste as you go. Freshly ground black pepper will offer a more pungent aroma and flavor.
- Turkey Stock or Broth: This is where the bulk of your gravy's flavor comes from. While store-bought turkey (or even chicken) stock/broth works perfectly fine and is a great time-saver, a homemade turkey stock will undoubtedly elevate your gravy to extraordinary levels. Look for low-sodium options if buying pre-made to have better control over the salt content.
Crafting Your Make-Ahead Turkey Gravy: A Step-by-Step Guide
Making this gravy is a straightforward three-step process, built on fundamental culinary techniques. The beauty lies in its simplicity and the forgiving nature of the steps.
The Art of the Roux: Building Your Flavor Foundation
A roux (pronounced "roo") is a mixture of cooked fat (in this case, butter) and flour, which serves as the base and thickening agent for your gravy. The color of your roux will significantly impact the final flavor and appearance of your gravy.
- Begin by melting your chosen butter in a medium saucepan over medium heat. Ensure the butter is fully melted but not browning too quickly.
- Once the butter is liquid, add your desired amount of salt and pepper. This helps infuse the seasonings into the fat.
- Slowly whisk in the all-purpose flour, bit by bit, ensuring it fully incorporates into the melted butter. Continue whisking constantly to prevent lumps.
- Cook the roux, continuing to whisk, until it reaches your desired coloring.
- Light Blonde Roux: Cook for 2-3 minutes. This will result in a lighter, more delicate gravy flavor.
- Golden or Nut-Brown Roux: Cook for 5-7 minutes or longer. This provides a richer, nuttier flavor and a deeper color, typical of a classic holiday gravy. Be careful not to burn the flour, as this will impart a bitter taste. The flour and butter should smell pleasantly toasty.
Achieving the perfect roux is a crucial step for a smooth, flavorful gravy. For more detailed insights into gravy techniques, explore our article on Easy No-Drippings Turkey Gravy: Perfect Every Time.
Whisking in the Stock: Achieving Velvety Perfection
Once your roux has reached its ideal color and aroma, it's time to transform it into luscious gravy.
- With the roux still warm over medium heat, begin slowly pouring in your turkey stock or broth. It's critical to add the stock gradually while constantly whisking. This prevents lumps from forming and ensures a smooth, uniform consistency.
- Continue to whisk vigorously as you add the stock. The mixture will initially be very thick, but as you add more liquid, it will loosen and become smooth.
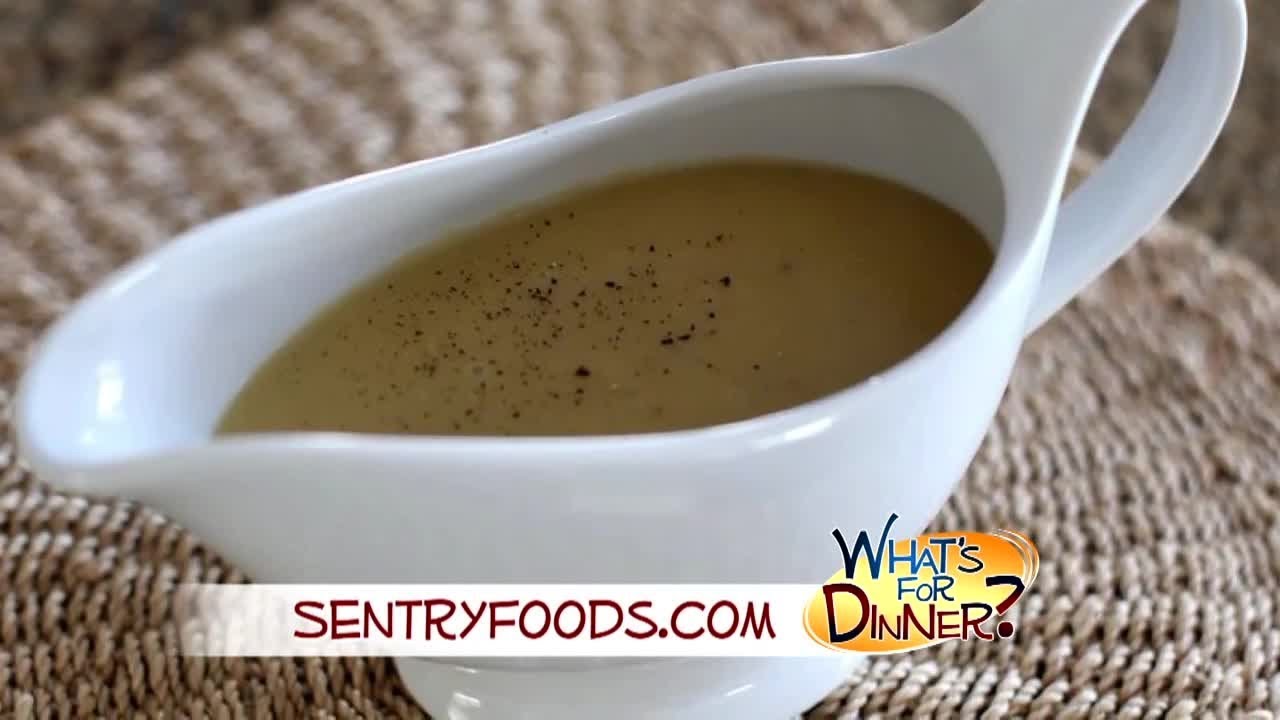
- Bring the mixture to a gentle simmer, continuing to whisk occasionally. As the gravy simmers, it will thicken. Cook until it reaches your desired consistency – whether you prefer a thinner, pourable gravy or a thicker, spoonable one. This usually takes about 5-10 minutes.
- Taste and adjust seasoning as needed. You may find it needs more salt, pepper, or perhaps a hint of poultry seasoning for extra depth.
Masterful Homemade Turkey Stock: Elevating Your Gravy (Optional but Recommended)
While store-bought stock is perfectly acceptable, making your own turkey stock offers an unparalleled depth of flavor that takes your make-ahead gravy to another level. It's also a fantastic way to utilize turkey parts often overlooked.
To make homemade turkey stock:
- Place 2-3 turkey legs, wings, or necks (or a combination) in a large Dutch oven or stockpot. These parts are rich in collagen, which gives the stock body and richness.
- Add a pinch of salt and pepper, along with any aromatic vegetables you prefer (e.g., chopped carrots, celery, onion, bay leaf, fresh thyme sprigs).
- Cover the turkey parts and vegetables generously with cold water.
- Bring to a gentle simmer, then reduce the heat to low, cover the pot, and let it simmer for at least 3-4 hours, or even longer (up to 6 hours). The goal is for the meat to become fork-tender and the stock to develop a deep, rich color and concentrated flavor. Skim any foam that rises to the surface during the first hour.
- Add more water if needed to keep the turkey covered throughout the simmering process.
- Once cooked, carefully remove the turkey parts from the stock. Strain the stock through a fine-mesh sieve (or cheesecloth-lined sieve) to remove any solids.
- Let the stock cool completely before refrigerating. The fat will rise to the top and solidify, which you can easily skim off before using. The leftover turkey meat can be shredded and used in sandwiches, wraps, pot pies, or soups.
Storage and Reheating: Enjoying Your Gravy Anytime
The true genius of freezer-friendly turkey gravy lies in its robust storage capabilities and seamless reheating. Proper storage ensures your gravy maintains its quality and flavor for weeks or even months.
Chilling and Refrigerating
If you plan to use your gravy within 3-4 days, refrigeration is sufficient:
- Allow the cooked gravy to cool completely at room temperature for no more than two hours. To speed up cooling, you can divide it into smaller, shallow containers.
- Transfer the cooled gravy to an airtight container.
- Store in the refrigerator for up to 3-4 days.
Freezing for Long-Term Enjoyment
For longer storage, freezing is your best friend:
- Ensure the gravy is completely cooled.
- Pour the gravy into freezer-safe containers, heavy-duty freezer bags, or even ice cube trays for individual portions. Leave about an inch of headspace if using rigid containers, as liquids expand when frozen.
- Label each container with the date.
- Freeze for up to 3-4 months. While it may technically be safe longer, flavor quality can diminish over time.
Reheating Your Make-Ahead Gravy
Bringing your gravy back to life is simple:
- Thawing: If frozen, ideally thaw the gravy overnight in the refrigerator. If you're in a hurry, you can gently thaw it in a microwave using the defrost setting or directly on the stovetop over very low heat.
- Stovetop Reheating (Recommended): Pour the thawed (or partially thawed) gravy into a saucepan over medium-low heat.
- Whisk constantly as the gravy warms to ensure it heats evenly and maintains its smooth texture.
- If the gravy has thickened too much during storage or reheating, whisk in a tablespoon or two of additional turkey stock, chicken broth, or even water until it reaches your desired consistency.
- Taste and adjust seasoning as needed. Sometimes a little fresh pepper or a pinch of salt can bring it back to life.
- Serve piping hot.
Troubleshooting Tip: If your gravy looks like it's separating or appears grainy after reheating, a quick blitz with an immersion blender or a transfer to a regular blender can often smooth it right out, restoring its creamy texture.
Conclusion
Embracing the strategy of make ahead turkey gravy is truly a culinary game-changer. It liberates you from last-minute kitchen chaos, especially during the holidays, and provides a consistent, delicious addition to countless meals throughout the year. With simple ingredients, straightforward steps, and the magic of your freezer, you can have rich, velvety, homemade turkey gravy at your fingertips whenever you desire. So, next time you're planning a big meal or just want to elevate a weeknight dinner, remember this freezer-friendly secret and prep ahead for flavor and peace of mind.
